Your blog category

Mobile Speaker Ya Mic Kaam Nahi Kar Raha? Diagnosis Aur Repair Ka Tareeqa

Mobile Speaker Ya Mic Kaam Nahi Kar Raha? Diagnosis Aur Repair Ka Tareeqa

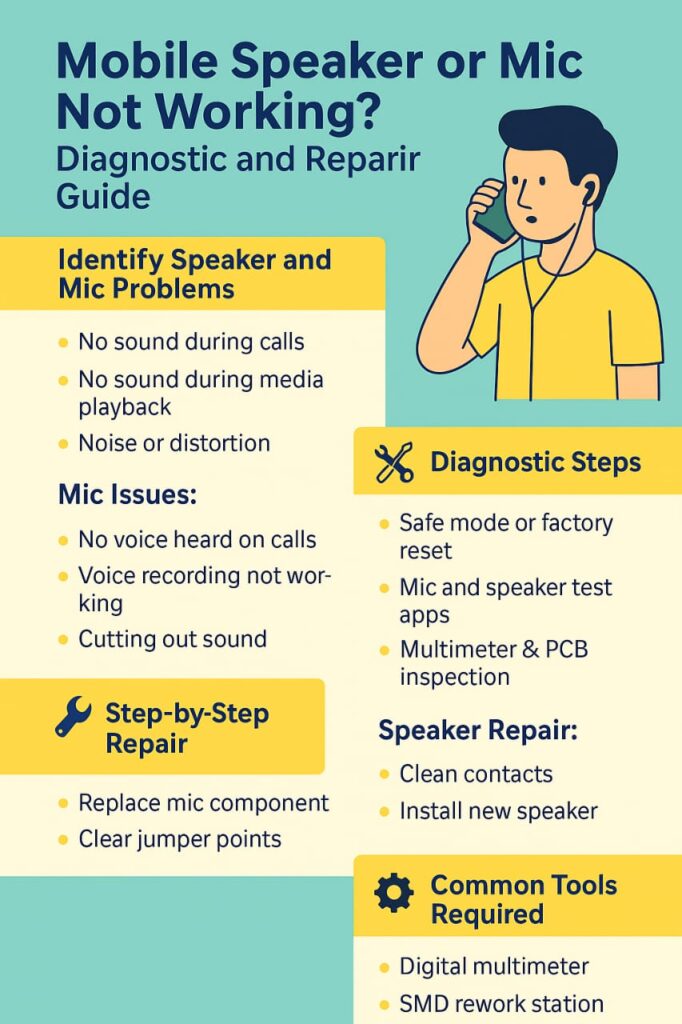
Mobile ka speaker ya mic agar kaam nahi kar raha, to yeh choti si problem nazar aane wali baat ho sakti haiβ€”lekin agar isse sahi tareeqay se handle na kiya jaye, to yeh ek bade customer complaint ka reason ban sakti hai. Is article mein hum jaanenge speaker aur mic ke common issues, unka diagnosis, aur expert-level repair tips.


βœ… Speaker Aur Mic Problems Ki Pehchan Kaise Karein?

Aksar technicians sirf external check karke decision le lete hain, lekin professional ban’ne ke liye aapko proper diagnosis process follow karna hoga:

Speaker Issues:

Call ke dauran awaz nahi aati

Media play karne par bhi koi sound nahi hoti

Speaker se noise ya distortion aata hai

Mic Issues:

Doosre shaks ko call par awaz nahi jaa rahi

Voice recording nahi ho rahi

Awaz cut-cut ke ja rahi hai
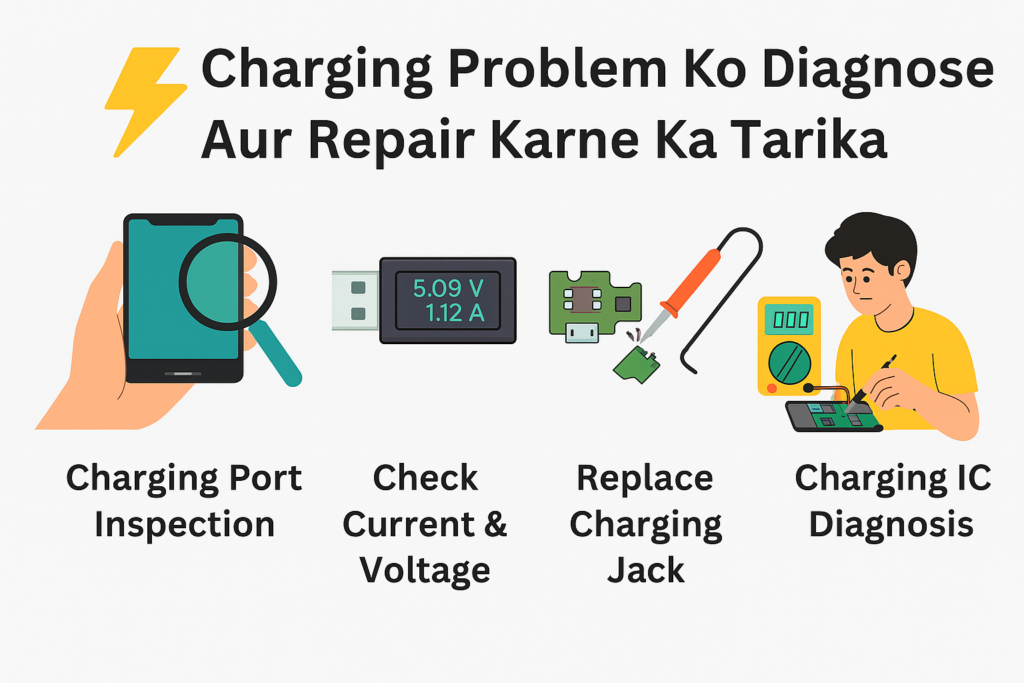

πŸ” Diagnosis Ka Professional Tareeqa

  1. Hardware ya Software?

Safe mode ya factory reset se check karein ke issue software ka hai ya nahi

Agar problem waise hi hai to hardware fault hone ka strong chance hai

  1. Mic/Speaker Test Apps Ka Use Karein

Jaise Device Info HW, Z-Device Test, ya MTK Engineering Mode

  1. Multimeter Se Component Test

Continuity check karein speaker aur mic ke dono terminals par

Jumper ya corrosion na ho to reading proper aayegi

  1. PCB Inspection

Corrosion, loose connection, ya liquid damage na ho β€” microscope se dekhein

Jumper points verify karein (schematic diagram ya experience se help lein)


πŸ”§ Repair Ka Step-by-Step Tareeqa

Mic Repair:

Soldering station se purana mic nikaalein

Proper compatible mic lagayein (Omnidirectional / Unidirectional as per model)

Jumper points clear karein agar track cut ho gaya ho

Speaker Repair:

Pehle speaker ke contacts clean karein

New original speaker lagayein (duplicate se sound quality effect hoti hai)

Agar problem board level par ho to audio IC ya filter components check karein
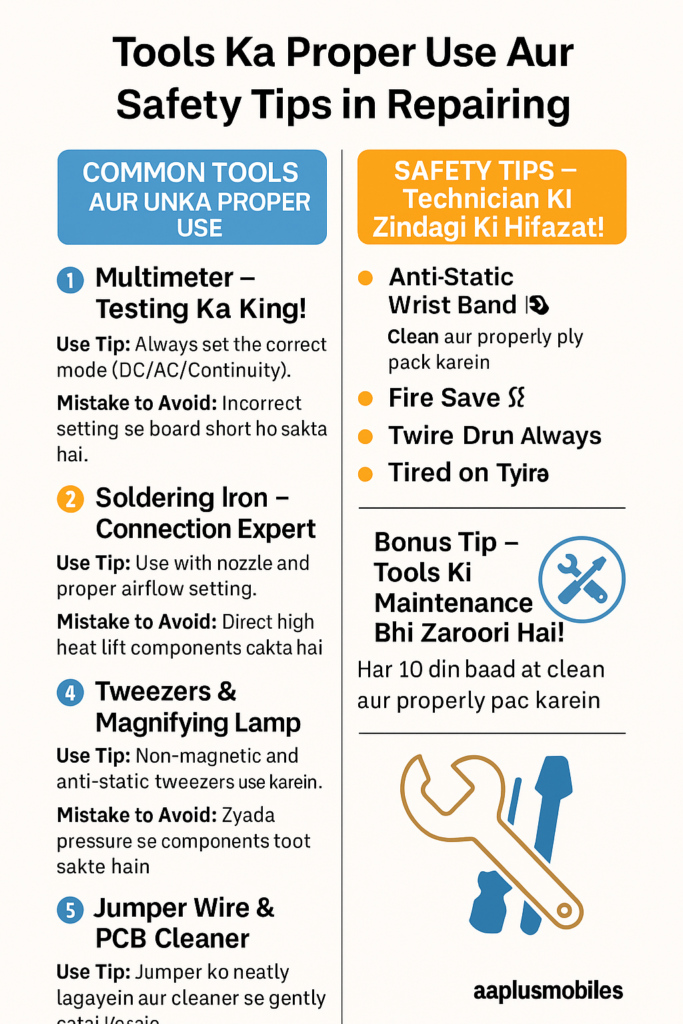

πŸ› οΈ Common Tools Jo Zaroori Hain

Digital Multimeter

SMD Rework Station

Schematic Diagrams (Model-wise)

ESD Tools (Mic aur speaker sensitive hote hain)


🧠 Pro Tips Jo Har Technician Ko Maloom Honi Chahiye

Duplicate parts ka istemal na karein – sound quality aur life dono khatam ho jati hai

Customer se poori history poochhein – β€œPhone gira tha?”, β€œPani laga?”, β€œKis model mein issue hai?”

Always final testing karein – call test, voice record, and speaker play sab kuch verify karein


πŸ“Œ Conclusion: Expert Technician Ban’ne Ka Raaz

Mic ya speaker ka kaam na karna aam baat lagti hai, lekin jo technician is issue ko accurately diagnose aur smartly repair karta hai β€” wahi ban’ti hai customer ki first choice. Agar aap bhi apni repairing skills mein level up lana chahte hain, to is article ke points ko daily practice ka hissa bana lijiye

Fingerprint Sensor Repair – Common Issues Aur Step-by-Step Fixing Guide

Fingerprint Sensor Repair – Common Issues Aur Step-by-Step Fixing Guide
Aaj kal ke smartphones mein fingerprint sensor na sirf ek luxury feature hai, balkay security aur convenience ka essential hissa bhi ban chuka hai. Lekin jab ye sensor kaam karna band kar de, ya bar bar fail ho, to user experience poor ho jata hai.

Is blog mein hum baat karenge un common fingerprint sensor problems ki jo aksar technicians ya mobile users ko face karni parti hain. Saath hi aapko milegi step-by-step repairing guide, jise follow karke aap kisi bhi fingerprint issue ko easily diagnose aur fix kar sakte hain – jaise aik trained mobile repair expert!


πŸ” Common Fingerprint Sensor Problems

  1. Sensor Not Responding:
    User finger lagata hai lekin koi response nahi milta – na unlock hota hai, na hi vibration feel hoti hai.
  2. Fingerprint Not Recognized:
    Multiple attempts ke bawajood phone unlock nahi hota. Kabhi kabhi registered finger bhi fail ho jati hai.
  3. Slow Performance:
    Sensor detect to karta hai, lekin bohat slow hota hai, ya delay se kaam karta hai.
  4. Physical Damage:
    Phone girne, pressure padne, ya water damage ki wajah se sensor damage ho sakta hai.
  5. Fingerprint Option Missing in Settings:
    Kabhi kabhi settings mein fingerprint ka option hi gayab hota hai – mostly software ya hardware failure ki wajah se.
  6. β€œFingerprint Hardware Not Available” Error:
    Ye error tab aata hai jab phone sensor ko detect hi nahi kar pata – ya to flex disconnected hoti hai ya IC fail.

🧠 Fingerprint Issues Ki Wajah (Root Causes)

  • Dust, Moisture ya Sweat:
    Sensor par mail, pani ya paseena ho to woh proper reading nahi le pata.
  • Software Glitch:
    OS update ke baad fingerprint feature bug kar sakta hai – especially Android devices mein common issue hai.
  • Loose or Damaged Flex Cable:
    Sensor ka flex cable agar motherboard se lose ho jaye ya damage ho to fingerprint function fail ho jata hai.
  • Water Damage or Short Circuit:
    Sensor IC water damage hone ki wajah se short ho sakti hai.
  • Low-Quality Screen Protectors:
    Kuch glass protectors sensor area ko block kar dete hain jisse detection slow ya impossible ho jata hai.

πŸ› οΈ Step-by-Step Fixing Guide (Technician Style)

1. Clean the Sensor Area

Pehle sensor ko soft microfiber cloth se gently saaf karein. Wet wipes avoid karein – kyunke sensor sensitive hota hai.

2. Reboot the Phone

Simple restart se kabhi kabhi fingerprint system wapas active ho jata hai.

3. Boot in Safe Mode

Phone ko safe mode mein chalayen. Agar fingerprint option aa jaye, to masla kisi third-party app ka ho sakta hai.

4. Update the Software

Settings > System > Software Update mein jakar latest updates install karein. Kai dafa bugs patch ho jate hain.

5. Check Using Hardware Code

Diagnostic code (like #0# in Samsung) use karke fingerprint module test karein.

6. Open Device & Reconnect Flex Cable

Back panel khol kar fingerprint sensor ki flex ko carefully motherboard se reconnect karein. Ye kaam sirf trained log karein.

7. Replace Fingerprint Sensor IC

Agar flex theek hai aur problem barqarar hai to sensor IC ko replace karna hota hai. Iske liye soldering aur microscope tools ki zarurat hoti hai.

8. Motherboard Track Test

Multimeter se check karein ke fingerprint IC ke tracks proper continuity mein hain ya nahi.

9. Factory Reset (As Last Option)

Agar software issue confirm ho aur sab kuch try karne ke baad bhi sensor kaam nahi kar raha, to phone ko factory reset karein. Backup lena na bhoolain!


πŸ’‘ Pro Tips for Long-Term Fingerprint Performance

  • Always Use Clean & Dry Fingers
    Gile ya oily fingers sensor ko confuse karte hain.
  • Avoid Over-Enrolling
    Zyada fingerprints register na karein – 2 ya 3 fingers enough hoti hain.
  • Use Tempered Glass with Fingerprint Cutout
    Sensor area par covered glass use na karein, fingerprint hole wale protector best hain.

πŸ”§ Technician’s Advice

Agar aap ek mobile repair technician hain, to fingerprint sensor ka masla samajhna aur usay fix karna aapki skillset ka important part hai. Har phone ka internal structure alag hota hai, is liye repairing mein care aur precision tools dono ka use lazmi hai.

Customer ko educate karna bhi zaroori hai – taake woh careless use ya pani ke contact se sensor damage na karein. Trust build karne ke liye transparent diagnosis aur clean repair process kaafi important hoti hai.


πŸ”š Conclusion

Fingerprint sensor problems har user ko kabhi na kabhi face karni parti hain. Lekin agar aap thoda technical knowledge aur proper tools se kaam karein, to in masail ko easily solve kiya ja sakta hai – bina expensive part replacement ke.

Agar aap technician hain, to yeh guide aapke liye goldmine hai. Aur agar aap general user hain, to hamari advice follow kar ke aap costly repairs se bach sakte hain.

Mobile Camera Problem & Solution, Blurry Black Screen Ya Not Working Solution Yahan Hai!

Mobile Camera Problem & Solution, Blurry Black Screen Ya Not Working Solution Yahan Hai!
Aaj kal har koi mobile camera ka deewana hai β€” selfies, reels, product photos, ya online classes, camera kaam na kare to zindagi ruk si jaati hai. Lekin kai log camera issues face karte hain, jaise:

Camera khulte hi black screen

Photo lene par blurry ya out of focus images

App open hote hi β€œCamera Failed” ka error

Camera kaam hi nahi karta, ya freeze ho jata hai

Agar aap bhi in problems ka shikar hain, to chinta chhodiye β€” is blog mein milega complete solution technician aur end user dono ke liye.


πŸ” Mobile Camera Issues – Sabse Common Problems

  1. Blurry or Out-of-Focus Photos

Aap photo lete hain, lekin image dhundhli hoti hai? Ye reasons ho sakte hain:

Camera lens dirty hai (fingerprints ya dust)

Auto-focus system ka error

Camera app lag ya bugs

Hardware fault (focus motor jammed)

  1. Black Screen on Camera

Camera app khulte hi kuch nazar nahi aata? Black screen ka matlab:

App crash ho raha hai

Hardware connection (camera flex) loose hai

Camera sensor dead ho gaya hai

Software ya ROM corrupted hai

  1. Camera Not Opening / Showing Error

Error messages jaise “Can’t connect to camera” ya “Camera failed” usually in issues ki nishani hain:

App conflicts (especially WhatsApp, Snapchat, ya Beauty Camera)

Permission settings ka masla

Hardware issue – front ya back camera IC damage

Faulty Android/OS update


πŸ”§ Easy Solutions for Users – Try These First!

Agar aap technician nahi hain, to ye steps ghar par try kar sakte hain:

βœ… 1. Lens Clean Karein

Soft microfiber cloth se gently camera lens clean karein. Dust & oil blur create karta hai.

βœ… 2. Phone Restart Karein

Restart se temporary bugs fix ho jaate hain, camera app fresh start leti hai.

βœ… 3. Camera App Cache Clear Karein

Android:
Settings > Apps > Camera > Storage > Clear Cache & Clear Data

βœ… 4. Safe Mode Try Karein

Safe mode se aap dekh sakte hain ke issue kisi third-party app ki wajah se to nahi.
Restart phone + long press volume down.

βœ… 5. Software Update Karein

Kabhi kabhi camera fix sirf update se ho jaata hai.
Check: Settings > Software Update


πŸ‘¨β€πŸ”§ Technician’s Guide – Repair Shop Ke Liye Tips

Agar aap ek mobile repair expert hain, to ye steps follow karein:

πŸ› οΈ 1. Hardware Check Karein

Flex wire properly connected hai ya nahi?

Water damage ke nishaan to nahi?

Microscope se camera lens ya module inspect karein

πŸ› οΈ 2. Camera Module Replacement

Agar camera app open hi nahi ho raha ya blur constant hai, module change karna padega.

πŸ› οΈ 3. Flashlight IC Test Karein

Aksar flashlight IC ya camera power IC kharab hoti hai, jisse camera dead ho jata hai.

πŸ› οΈ 4. Reballing / Jumper Work

In extreme cases (especially after liquid damage), reballing ya jumper lagana hota hai camera section ke andar.


πŸ’‘ Bonus Tips – Future Problems Ko Rokne Ke Liye

Phone girne ya pressure se camera hardware damage ho sakta hai β€” shockproof cover use karein

Camera heavy apps (Snapchat, TikTok) uninstall karke try karein

Storage full hone par bhi camera crash karta hai β€” space free karein


🧠 Expert Advice

Mobile camera sirf ek feature nahi, ek zarurat ban chuka hai. Agar camera theek kaam nahi kar raha, to use ignore mat karein. Har problem ka solution hai β€” chahe wo simple cleaning ho ya IC-level repair.

Agar aap technician hain, to customer ko clear explain karein ke camera issue software ka hai ya hardware ka β€” aur genuine part hi use karein taake customer satisfied rahe.

Overheating Mobile Problems And Solution – Causes Effects & Fixes

Overheating Mobile Problems And Solution – Causes Effects & Fixes
Mobile overheating is a common yet often ignored problem that can lead to serious damage to your device and performance issues over time. Whether you’re a technician or a user, understanding why phones heat up, what harm it can cause, and how to fix and prevent it is crucial.


πŸ“± Why Do Mobiles Overheat?

Here are the most common reasons why a phone gets hot:

  1. Excessive Usage

Using your phone for long hours β€” especially gaming, video streaming, or multitasking β€” can push the processor and GPU to their limits, causing heat buildup.

  1. Background Apps

Too many apps running in the background eat up memory and CPU, resulting in unnecessary heat.

  1. Poor Ventilation

Using your phone in hot environments or keeping it under pillows or blankets restricts air flow, trapping heat.

  1. Software Bugs or Malware

Corrupted apps, system glitches, or malicious software can cause processes to run non-stop, overworking the CPU.

  1. Charging Issues

Using a cheap or incompatible charger, or using the phone while charging, often causes overheating. Fast charging without proper heat dissipation also contributes.

  1. Hardware Faults

Sometimes, faulty batteries, damaged charging ICs, or power management circuits lead to overheating. These issues need professional attention.


⚠️ Effects of Overheating on Mobile Phones

Ignoring phone heat can lead to:

Battery Damage: Excessive heat degrades battery health quickly.

Device Lag: Thermal throttling reduces performance to control temperature.

Auto Shutdowns: Many phones shut down automatically when overheated to prevent damage.

Screen Discoloration or Burn-in

Hardware Failure: Prolonged heat can permanently damage ICs or even melt components.


πŸ› οΈ How to Fix an Overheating Phone?

βœ… 1. Limit Heavy Usage

Take breaks between gaming or video streaming. Don’t run too many apps at once.

βœ… 2. Clear Background Apps

Regularly close apps you’re not using. Use β€œDevice Care” tools or cleaning apps carefully.

βœ… 3. Avoid Heat-Prone Environments

Don’t use your phone under direct sunlight. Avoid keeping it in cars or on beds while charging.

βœ… 4. Update Software

Always keep your phone’s OS and apps updated. Bug fixes and patches can solve heating issues.

βœ… 5. Use Original Chargers

Avoid cheap third-party chargers. Use certified and compatible accessories only.

βœ… 6. Battery Health Check

Use tools like AccuBattery (for Android) to monitor battery temperature and health. If the battery is swelling or draining fast, replace it immediately.

βœ… 7. Remove the Phone Case

Some cases trap heat. Remove them while gaming or charging.


πŸ‘¨β€πŸ”§ Technician Tips (Advanced)

For mobile repair experts:

Check Charging IC & Battery Connector: Heating near the battery area may indicate a faulty charging IC.

Use a Thermal Camera: It helps in spotting overheating components on the motherboard.

Reballing/Replacement: For advanced overheating issues due to faulty ICs, reballing or replacing PMICs or CPU might be required.


🧠 Bonus Tips to Prevent Overheating

Turn on Battery Saver Mode when not in use.

Don’t use high-performance modes unless necessary.

Keep your phone’s storage at least 20% free.

Avoid using your phone during charging for long durations.


πŸ“Œ Final Words

Overheating might seem minor, but it can become a serious issue if not addressed. As a mobile user, you should follow best practices. And as a technician, always educate your customers about the risks and fixes.

A cool phone is a healthy phone. πŸ”§πŸ“±


βœ… SEO Tags

Overheating mobile solution, phone heat problem fix, mobile repairing guide, smartphone overheating reason, mobile heat protection, mobile lag fix, battery heat issue, why phone heats up, phone heat solution, repair phone heating


Touch Screen Problem Aur Iska Hal – Step by Step Guide

Meta Description:

Touch screen kaam nahi kar rahi? Mobile screen touch issue ka asaan hal janiye is guide mein – DIY tips, expert advice, aur safety instructions ke saath. Best solution for unresponsive touch screen problems in Urdu!


Introduction

Aaj ke smartphones ka sabse essential hissa hota hai unka touch screen. Lekin sochiye agar aapka phone respond karna band kar de ya screen lag kare? Na scrolling kaam kare na typing ho. Frustration ka level sky-high ho jata hai! Is article mein hum step-by-step batayenge ke touch screen problem kaise diagnose karein aur uska hal kaise nikalein – professional aur safe tareeqe se.


Step 1: Problem Ko Pehchaaniye

Sabse pehle yeh samajhna zaroori hai ke issue hardware ka hai ya software ka. Kuch aam symptoms:

  • Screen par touch ka response slow ya bilkul band ho jana
  • Screen ka specific area kaam na karna
  • Ghost touch (screen khud ba khud operate hona)
  • Lag ya freeze hona jab bhi touch karein

Step 2: Software Check Karein

Bohat dafa screen issue kisi software glitch ki wajah se hota hai. Yeh solutions try karein:

βœ… Restart Phone – kabhi kabhi temporary bug hota hai
βœ… Safe Mode – check karein third-party apps ki wajah se issue to nahi
βœ… Software Update – purana firmware touch errors create kar sakta hai
βœ… Factory Reset – extreme case mein, lekin pehle backup zaroor lein


Step 3: Screen Test Apps Use Karein

Google Play Store mein kuch free apps available hoti hain jaise:

  • Touch Screen Test
  • MultiTouch Tester
  • Display Tester

In apps ki madad se aap verify kar sakte hain ke screen kis area mein kaam nahi kar rahi.


Step 4: Hardware Issues Check Karein

Agar software sab theek hai, to ab hardware side se check karein:

πŸ”§ Loose Connection – phone girne ya pressure lagne se touch connector loose ho sakta hai
πŸ”§ Water Damage – agar phone bheeg gaya ho to screen short ho sakti hai
πŸ”§ Damaged Screen – cracks ya burn spots usually hardware fault ka indication hoti hain
πŸ”§ Battery Issue – kabhi kabhi swelling battery screen ke pressure mein interfere karti hai


Step 5: Safe Repair Process

Agar aap khud technician hain ya seekh rahe hain, to safe repairing ke liye yeh steps follow karein:

  1. Power Off Phone – safety ke liye zaroori hai
  2. Back Cover & Battery Remove (agar removable ho)
  3. Touch Connector Check – carefully disconnect karein, clean karein, phir reconnect
  4. Multimeter se Continuity Check karein
  5. Display Replace – agar sab kuch fail ho jaye to new screen lagana behtareen hal hai

Bonus Tip: Screen Protector Use Karein

Agar aap chahte hain ke future mein touch problem na aaye, to high-quality screen protector ka istemal karein. Yeh na sirf scratches se bachaata hai, balki minor water splashes ya pressure se bhi touch ko protect karta hai.


Conclusion

Touch screen problems har kisi ke saath ho sakti hain, lekin ghabrane ki zarurat nahi. Upar diye gaye tips aur methods se aap asaani se samajh sakte hain ke problem kaha hai aur uska hal kya hai. Agar phir bhi issue solve na ho, to certified technician se consult karna behtar hai.

Display Change Karne Ka Asaan Aur Safe Tarika

Meta Description,
Mobile display ka damage hona aam baat hai, lekin usay safely aur professional tareeqe se change karna har technician ko aana chahiye. Is guide mein jaaniye display change ka asaan aur safe tareeqa, step-by-step!


πŸ“± Aaj Kal Har Doosra Phone Display Problem Ka Shikaar Kyun Hai?

Jese jese smartphones ka istemal barhta ja raha hai, accidental drops aur screen damage bhi aam baat ban gayi hai. Har technician ke liye display replacement ka kaam routine ka hissa hai β€” lekin agar aap isko sahi tareeqe se nahi karte, to customer ka phone aur zyada kharab ho sakta hai.

To aaj hum baat karenge display change karne ke ek asaan, safe, aur professional tareeqe ki β€” jise follow karke aap na sirf behtareen kaam karenge, balki apne customers ka trust bhi jeetenge.


πŸ”§ Step-by-Step Display Replacement Guide:

Step 1: Phone Ka Model Identify Karna

Sabse pehle, phone ka exact model number aur display type (LCD / AMOLED) confirm karein. Har phone ka design aur flex cable location alag hoti hai.

Step 2: Tools Ready Karein

Use proper tools only:

  • Opening tools (Plastic prying tools)
  • Suction cup
  • Heat gun, ya separator machine
  • Anti-static gloves
  • Magnetic screwdriver set
  • Display testing cable

Achi quality tools use karna safety aur efficiency dono ke liye zaroori hai.

Step 3: Battery Disconnect Karna

Always disconnect the battery before touching any internal component. Ye ek golden rule hai jo short-circuit aur damage se bachata hai.

Step 4: Heat Lagana (Agar Display Glued Hai)

Heat gun ya LCD separator ka use karke display ke edges ko gently garam karein takay glue halka ho jaye.

Caution: Zyada heat se phone ka motherboard ya display dono kharab ho sakte hain. 70-90Β°C ka temperature best hota hai.

Step 5: Display Remove Karna

Plastic tools aur suction cup ka use karke purani display ko gently nikaalein. Kabhi bhi tez force na lagayein, warna flex cable damage ho sakti hai.

Step 6: Naya Display Test Karna

Naya display lagane se pehle use motherboard se temporarily connect karke test karein. Touch, brightness, colors β€” sab theek kaam kar rahe hain ya nahi?

Step 7: Final Installation

Agar display theek kaam kar raha hai, to glue ya double tape laga kar securely fit kar dein. Dhyan rahe ke sensor aur camera areas ko clean rakhna hai.

Step 8: Battery Connect Karke Power On Karein

Ab battery connect karke phone ko on karein aur final testing karein:

  • Touch Response
  • Brightness
  • Auto-brightness
  • Proximity sensor
  • Display alignment

πŸ›  Pro Tips Jo Aapko Expert Technician Banayengi:

  • ESD protection ka use karein β€” Static electricity se IC damage ho sakti hai.
  • Har naya display install karne se pehle customer ka old screen zarur return karein β€” ye trust build karta hai.
  • Use B-7000 ya T-7000 glue only β€” ye flexible aur durable hoti hai.

🎁 Bonus Tip:

Agar aap ek hi model ke phones zyada repair karte hain (jaise Infinix, Oppo ya Vivo), to unka dummy frame kharid lein. Is se naya display test karna aur repair karna dono asaan ho jata hai, aur original phone ko unnecessary damage se bachaya ja sakta hai.


✍️ Final Words:

Mobile display replacement koi mushkil kaam nahi β€” agar aap proper steps aur tools ka use karein. Aap jitna safe aur clean kaam karenge, utni hi zyada aapki reputation barhegi. Har technician ko chahiye ke wo quality aur safety ko hamesha priority dein.


How to Diagnose and Repair a Charging Problem.

Charging Problem Ko Diagnose Aur Repair Karne Ka Tarika,

Meta Description:
Charging Problem Ko Diagnose Aur Repair Karne Ka Tarika – Step-by-step guide in Urdu to identify faulty chargers, ports, batteries, aur motherboard components. Expert tools, tips, aur safety advice only at aaplusmobiles.com!


Aaj kal har mobile user ko β€œPhone charge nahi ho raha” ya β€œCharging bahut slow hai” jaise masail ka samna hota hai. Lekin agar aap sahi diagnosis seekh lein, to 80% charging problems aap apne workshop ya ghar par asaani se repair kar sakte hain! πŸ‘¨β€πŸ”§

Iss article mein hum cover karenge:

  1. Symptoms pehchanna
  2. Basic checks se start karna
  3. Tools aur advanced tests
  4. Common repair solutions
  5. Safety tips
  6. Bonus Tip

1️⃣ Charging Symptoms Pehchanein

Pehla step hai user ki complaint ko gaur se sunna aur khud observe karna:

  • No charging indication: Phone mein β€œCharging” icon hi nahi aata ⚑
  • Very slow charging: 0–1% charge barhta hai, phir ruk jata hai 🐒
  • Intermittent charging: Cable hilne par charge connect/disconnect hota hai πŸ”„
  • Charging heat: Phone ya charger bahut garam ho raha hai πŸ”₯

2️⃣ Basic Checks – β€œFaulty Cable Ya Adapter?” 🧐

Sab se pehla test: Hardware ko rule out karen:

  • Different Cable & Adapter: Original ki jagah dusra charger/cable lagayein.
  • Port Cleaning: Toothpick ya compressed air se charging port saaf karein.
  • Wall Socket Check: Kabhi kabhi wall socket hi dead hoti hai! πŸ”Œ

Agar yahan se issue solve ho gaya, to aapka kaam ho gaya β€” naya cable/adapter use karein. βœ…


3️⃣ Tools Aur Advanced Testing πŸ”§

Agar basic check se problem solve nahi hoti, to advanced diagnosis karna hoga:

ToolUse Case
πŸ” MultimeterVoltage & continuity check of port/battery
πŸ”‹ Battery TesterBattery health & current draw measurement
πŸ”₯ Thermal GunHeat spots dhoondhne ke liye
πŸ”¬ MagnifierCorrosion, bent pins, loose solder inspect

Multimeter Se Voltage Check

  1. Phone off karein, probes ko port ke VCC/GND points pe lagayein
  2. Reading ~5V (USB) ya ~9V/12V (fast-charge) honi chahiye
  3. Agar low ya zero, to charging IC ya fuse ho sakta hai faulty

4️⃣ Common Repair Solutions πŸ› οΈ

βœ”οΈ Charging Port Replacement

  • Agar pins loose/damaged hon, port swap karna best solution hai.

βœ”οΈ Fuse Repair / Jumper Lagana

  • Multimeter se fuse ya PCB trace continuity check kar ke jumper wire se trace bypass karein.

βœ”οΈ Charging IC Replacement

  • Agar IC heat ho rahi ho, to hot air gun se IC remove karke nayi lagayein.

βœ”οΈ Battery Replacement

  • Battery internal resistance agar zyada ho (multimeter se measure karein), to replace karna padega.

5️⃣ Important Safety Tips ⚠️

  • ESD Strap pehnen: Static se board bachayein
  • Power Off: Repair se pehle phone off aur battery disconnect karein
  • Low Heat: Soldering/IC work mein zyada heat avoid karein
  • Ventilation: Accha airflow ho, toxic fumes se bachein

🎁 Bonus Tip – Charge Cycle Reset Karke Try Karein πŸ”„

Kayi dafa software glitch hoti hai jo charging detection block kar leti hai. Reset ke liye:

  1. Phone ko 100% discharge hone dein (phone off hone tak)
  2. 5 minute ke liye rest karein
  3. Phir original charger se charge start karein
  4. Agar 0β†’100% smooth ho jaye, to software bug tha!

Proper Use of Tools and Safety Tips in Repairing – Every Technician Must Know!

βœ… Meta Description

Tools ka proper use aur safety tips in repairing – Learn how to safely use mobile repairing tools like multimeter, soldering iron, hot air gun, and avoid common mistakes. Full safety guide only on aaplusmobiles.com.


πŸ”§ Repairing Mein Tools Ki Importance – Pehle Samajhna Zaroori Hai

Mobile repairing koi magic nahi – ye aik proper skill hai jisme tools ka sahi use aapko pro technician banata hai. Lekin agar aap ye tools galat tareeqe se use karen, to sirf phone hi nahi, kabhi kabhi board bhi damage ho sakta hai… ya khud ko bhi injury ho sakti hai! 😬

Is liye har repairing student ko ye samajhna bohat zaroori hai ke tools ka sahi use kya hai aur unse safe repairing kaise ki jati hai.


πŸ”© Common Tools Aur Unka Proper Use

1️⃣ Multimeter – Testing Ka King!

Multimeter se aap voltage, continuity, aur resistance measure karte hain.
Use Tip: Always set the correct mode (DC/AC/Continuity) before testing.
Mistake to Avoid: Incorrect setting se board short ho sakta hai.


2️⃣ Soldering Iron – Connection Expert

Isse aap components ko PCB par solder karte hain.
Use Tip: Use a clean tip and keep the temperature moderate (280Β°C–350Β°C).
Mistake to Avoid: Overheating can burn the board or damage components.


3️⃣ Hot Air Gun – IC Removal Tool

IC ko remove/replace karne ke liye perfect tool.
Use Tip: Use with nozzle and proper airflow setting.
Mistake to Avoid: Direct high heat can lift nearby components.


4️⃣ Tweezers & Magnifying Lamp

Micro-level components handle karne mein madad karte hain.
Use Tip: Non-magnetic and anti-static tweezers use karein.
Mistake to Avoid: Pressure zyada dena se components toot sakte hain.


5️⃣ Jumper Wire & PCB Cleaner

Track repair aur board cleaning ke liye must tools.
Use Tip: Jumper ko neatly lagayein aur cleaner se gently safai karein.
Mistake to Avoid: Zyada liquid ya force use na karein.


⚠️ Safety Tips – Technician Ki Zindagi Ki Hifazat!

πŸ’‘ Anti-Static Wrist Band Use Karein – Board ko static shock se bachata hai
🧯 Fire Safety – Workshop mein fire extinguisher zaroor ho
🧀 Gloves Aur Mask Pehnein – Dust ya chemical exposure se bachne ke liye
🚫 Don’t Repair When Tired – Ghaltiyaan zyada hoti hain jab aap thakay hue hon
πŸ”Œ Power Off Always – Phone ko repair se pehle disconnect karein


πŸ“‰ Galtiyan Jo Aksar Beginners Karte Hain

❌ Tools saste aur local use karna
❌ Without multimeter diagnose karna
❌ Direct power connect karna bina testing ke
❌ ESD safety ignore karna
❌ Tutorial videos dekh kar bina practice ke kaam start karna


🧠 Summary – Smart Bano, Safe Repair Karo!

Agar aap mobile repairing ko professional level par le jana chahte hain, to tools ka sahi use aur safety rules follow karna sabse pehla step hai. Sirf repairing kar lena kaafi nahi – smart aur safe technician banna important hai.

Tools ka ghalat use na sirf mobile ko nuksan deta hai, balkay aapki reputation bhi kharaab kar sakta hai. Is liye har naye technician ko chahiye ke pehle safety seekhe, phir speed badhaye!


🎁 Bonus Tip – Tools Ki Maintenance Bhi Zaroori Hai!

Har 10 din baad apne tools ko:

πŸ”Ή Clean karein (especially soldering iron & multimeter probes)
πŸ”Ή Properly pack karein after use
πŸ”Ή Heat gun filters ko saaf karein
πŸ”Ή Broken wires ya tips ko turant replace karein
πŸ”Ή Soldering stand aur sponge use karein for tip cleaning

Tip: Tools ki safai aur protection se unki life double ho jati hai – aur aapka kaam bhi fast aur reliable hota hai.

Bonus Tip: Apne Tools Ki Lifespan Ko Kaise Barhayein? πŸ› οΈπŸ”‹

Agar aap chahte hain ke aapke repairing tools lambe arse tak kaam karein, to unki proper maintenance aur sahi jagah par storage bohot zaroori hai. Har tool ka apna ek specific use hota hai β€” unka overuse ya galat tarike se istemal na sirf unko damage karta hai, balkay aapke mobile repairing results ko bhi affect karta hai. Tools ko hamesha clean rakhain, moisture se door rakhein aur use ke baad proper case ya box mein wapas rakhain. Ek achhe technician ke paas sirf tools nahi, unka ilm aur zimmedari ka jazba bhi hota hai!


Mobile Unlocking Course – Opportunities Aur Skills

Meta Description

Mobile Unlocking Course – Discover how to unlock phones like a pro! Learn FRP bypass, SIM unlock, bootloader unlock, and top tools for mobile unlocking. Perfect for aspiring technicians at aaplusmobiles.com.


πŸ“² Kya Aap Mobile Unlocking Seekhna Chahte Hain?

Aaj kal har doosra customer kisi na kisi locked mobile ke saath aapke workshop ka rukh karta hai – kisi ka FRP lock laga hota hai, kisi ka SIM locked hota hai, aur kuch log pattern bhool jaate hain. Agar aap ek professional mobile technician banna chahte hain, to Mobile Unlocking Course aap ke liye ek zabardast opportunity hai.

Unlocking sirf ek technical skill nahi hai – ye ek income-generating business model bhi hai jahan har din naye customers aate hain, naye challenges hote hain, aur naye solutions nikalne padte hain.


πŸ” Mobile Unlocking Hota Kya Hai?

Mobile unlocking ka matlab hai kisi bhi phone ko uski limitations se azaad karna – jese:

  • SIM Lock Unlocking – Phone ko kisi bhi network ke SIM card ke liye open karna
  • FRP (Factory Reset Protection) Unlock – Google account verification bypass karna
  • Bootloader Unlock – Custom ROMs ya rooting ke liye
  • Pattern/Password Removal – Lock screen bypass karna

Yeh sari cheezein ek expert technician ko aani chahiyein, aur isi liye ye course aapke liye important hai.


πŸ“˜ Mobile Unlocking Course Mein Kya Sikhaya Jata Hai?

Mobile unlocking course ek beginner-friendly training program hota hai jahan theory ke sath sath practical hands-on experience bhi diya jata hai. Yahan aap seekhte hain:

βœ… Core Skills You Will Learn:

  • FRP lock ko kaise safely remove karein
  • SIM unlock techniques for major brands (Samsung, Xiaomi, Vivo, etc.)
  • Bootloader unlocking with ADB/Fastboot
  • Pattern/password unlock with data backup
  • Phone unlocking tools ka real use (dongles, boxes, software)

πŸ”§ Tools Jo Har Unlocking Expert Ko Aane Chahiye:

Tool NameUse Case
UMT DongleUniversal Mobile Unlocking Tool
Miracle BoxFRP bypass, IMEI repair
Chimera ToolSamsung, Huawei, Xiaomi unlocking
Octoplus BoxProfessional FRP & network unlock
SP Flash ToolMediaTek phones ke liye flashing

Ye tools aapko har mobile ka lock todne mein madad denge – safely, effectively, aur legal tareeqe se.


πŸ’Ό Opportunities – Skill Nahi, Business Hai!

Mobile unlocking ek skill se zyada ek income source ban chuka hai.
Chaliye dekhte hain aap is course se kya kama sakte hain:

πŸ’° Unlocking Kar Ke Kamaai Kaise Ho Sakti Hai?

  • Har phone unlock ka charge Rs. 500–1500 tak
  • Ghar baithe online services dena
  • Apni mobile shop mein service add karna
  • Freelancing platforms par global clients lena
  • Phone resale business mein faida uthana

Unlocking course complete karne ke baad aap apne area ke expert ban sakte hain. Trust ban jata hai, aur customers aapko recommend karte hain.


🚨 Safety Tips Jo Har Technician Ko Yaad Rakhni Chahiye:

  • πŸ”‹ Flashing ya unlocking se pehle phone ka full backup lein
  • ❌ Galat firmware ya tool use na karein – phone dead ho sakta hai
  • βœ… Sirf trusted tools aur boxes ka use karein
  • πŸ’Ό Har unlocking ka legal use samjhein – illegal unlocks se hamesha bachein

🧠 Summary – Skill Seekhiye, Future Banaiye!

Mobile Unlocking Course ek aisi skill hai jo aapko market-ready banati hai. Har customer ki zarurat aap samajhne lagte hain, aur har model ka lock confidently unlock kar paate hain.
Chahe aap beginner ho ya intermediate level technician – unlocking course aapko ek earning technician mein convert kar deta hai.

Toh aaj se shuruaat karein – aaplusmobiles.com par rozana naye blogs padhein, tools seekhein, aur mobile unlocking expert banne ki journey start karein!

🎁 Bonus Tip – Online Unlocking Services Se Extra Income Kaise Kamayein? πŸ’Έ

Agar aap physically shop nahi chalate ya aapke paas zyada investment nahi hai, to aap online unlocking services bhi shuru kar sakte hain. Aaj kal log WhatsApp, Facebook Groups, Fiverr aur Freelancing websites par bhi mobile unlocking ki services de rahe hain.

βœ… Aap kisi trusted unlocking supplier se service le kar apne client ko resale kar sakte hain.
βœ… Sirf IMEI number le kar online tools ya dongle access se unlock provide karna possible hai.
βœ… Aap customer ka phone liye bina remote unlocking bhi offer kar sakte hain.

Is tarah aap ghar baithay zero investment se ek unlocking business shuru kar sakte hain!

Software Flashing Kya Hai? Tools Aur Tarika – Mobile Repairing Expert Guide

Meta Description:
Software Flashing Kya Hai? Tools Aur Tarika – Is article mein jaaniye software flashing ka matlab, us ke liye required tools, aur poora flashing process step by step. Ideal guide for mobile repairing students and professionals.


πŸ” Software Flashing Kya Hoti Hai?

Software flashing ka matlab hai mobile ke operating system (firmware) ko dobara install karna ya update karna. Jab phone hang ho jaye, boot loop mein chala jaye, pattern lock na khule, ya virus aa jaye – to flashing hi ultimate solution hota hai! πŸ’‘

Zyada tar flashing 2 wajah se ki jati hai:

  1. Stock ROM flashing – original software ko dobara install karna
  2. Custom ROM flashing – naye features ke liye customized software install karna

πŸ› οΈ Software Flashing Ke Liye Zaroori Tools

Flashing ka kaam karne ke liye aapko kuch essential tools aur software chahiye honge:

βœ… Hardware Tools:

  • πŸ”Œ USB Data Cable (Original/Good Quality)
  • πŸ’» Computer or Laptop
  • πŸ”‹ Charged Mobile (Minimum 50%)

βœ… Software Tools (PC mein install hone chahiye):

  • SP Flash Tool (MTK phones ke liye)
  • Odin Tool (Samsung devices ke liye)
  • Mi Flash Tool (Xiaomi phones ke liye)
  • QFIL Tool (Qualcomm phones ke liye)
  • MTK/Qualcomm Drivers
  • Firmware/ROM file (jo aapke device model ke mutabiq ho)

πŸ‘¨β€πŸ”§ Software Flashing Karne Ka Tarika (Step-by-Step)

Yahan ek basic flashing process explain kiya gaya hai (SP Flash Tool ka example le kar):

πŸ”Ή Step 1: Backup Lain

Flashing se pehle data ka backup zaroor lein – warna sab kuch delete ho jayega.

πŸ”Ή Step 2: USB Drivers Install Karein

MTK ya Qualcomm device ke drivers apne computer mein install karein taki phone detect ho jaye.

πŸ”Ή Step 3: Flash Tool Install Karein

SP Flash Tool ko download karein aur extract kar ke open karein.

πŸ”Ή Step 4: Right Firmware Choose Karein

Apne phone ka exact model number dekh kar correct firmware choose karein. Agar galat firmware flash kiya to phone dead bhi ho sakta hai. ⚠️

πŸ”Ή Step 5: Scatter File Load Karein

Firmware folder se .scatter file ko load karein SP Flash Tool mein.

πŸ”Ή Step 6: Download Button Press Karein

Flashing shuru karne ke liye β€œDownload” button dabayein.

πŸ”Ή Step 7: Phone Connect Karein (Switched Off)

Phone ko switch off kar ke data cable se PC se connect karein. Kuch hi seconds mein flashing start ho jaye gi.

πŸ”Ή Step 8: Wait for Green Tick βœ…

Flashing complete hone ke baad green tick nazar aayega. Ab phone ko disconnect kar ke on karein.


πŸ’‘ Kab Flashing Karna Zaroori Hota Hai?

  • Phone stuck ho β€œboot logo” pe
  • Pattern ya password bhool gaye ho
  • Phone pe virus attack ho gaya ho
  • System apps crash ho rahi ho
  • Phone slow ya laggy ho gaya ho
  • Mobile dead ho jaye (but hardware ok ho)

⚠️ Safety Tips for Flashing + Gift

  • πŸ”‹ Phone ka 50% se zyada battery ho
  • πŸ”Œ Flashing ke dauraan data cable nikaalna nahi
  • βœ… Hamesha official ROM hi download karein
  • πŸ’Ύ Backup lena mat bhoolen
  • ❌ Galat model ka firmware use na karein
  • Gifr Ye Hai K aap ko har tarah ki free Files Mil Jay Gi is Website Gsmexpertmobiles sy

🧠 Summary

Flashing Ka Faaida Aur Future Scope
Software flashing har technician ke skill set ka essential part hai. Ye na sirf corrupted system files ko replace karta hai balkay dead phones ko bhi revive kar sakta hai. Flashing karte waqt safety precautions lena bohot zaroori hai, jaise ke correct firmware ka selection, backup lena, aur power loss se bachna.

Aaj kal kai mobile brands ka firmware freely available hai aur tools bhi affordable hote ja rahe hain – jese SP Flash Tool, Odin, Miracle Box, etc. Har mobile technician ko chahiye ke wo flashing tools ke sahi use, firmware compatibility, aur error handling mein expert ho jaye.

Agar aap ek student hain ya workshop chala rahe hain, to software flashing aap ke liye ek golden skill ho sakti hai jo na sirf aapko different banati hai, balkay aapke income sources bhi barhati hai.

Toh ready ho jaiye professional technician banne ke liye – flashing seekhiye, tools use karna sikhiye aur har software issue ka smart solution dijiye! πŸ’»βš™οΈπŸš€

Agar aap bhi flashing seekh kar expert banna chahte hain, to aaplusmobilaaplusmobiles.comes.com par naye courses check karna na bhoolen!