Why You Should Avoid Cheap Local Parts in Mobile Repair
Why You Should Avoid Cheap Local Parts in Mobile Repair
Mobile repairing industry me ek bohot common masla hai – cheap local parts ka use. Bohot se customers paisa bachane ke liye duplicate ya low-quality parts install karwa lete hain, lekin asal me ye decision unke mobile aur pocket dono ke liye risky sabit hota hai. Is article me hum jaanenge ke cheap local parts ka nuksan kya hai, kyun avoid karna chahiye aur genuine parts ka faida kya hai.

❌ Cheap Local Parts Kya Hote Hain?

Local ya duplicate parts wo hote hain jo original manufacturer ke standards par nahi bane hote. Ye parts bazar me saste rate par mil jate hain, lekin inki quality, durability aur performance original parts jaisi nahi hoti.

🚨 Problems with Cheap Local Parts

1. Low Durability ⏳

Ye parts zyada din chal nahi pate.

Thodi si heat, pressure ya moisture se kharab ho jate hain.

2. Poor Performance ⚑

Display ki brightness kam hoti hai.

Touch lag karta hai ya delay deta hai.

Battery zyada jaldi drain hoti hai.

3. Heating Issues πŸ”₯

Duplicate batteries aur charging ICs zyada heat produce karte hain.

Kabhi kabhi blast ka risk bhi hota hai.

4. Risk to Other Components πŸ› οΈ

Low quality parts poore motherboard ko damage kar sakte hain.

Example: sasti charging IC ya cable se Power IC short ho jata hai.

5. Customer Dissatisfaction 😑

Customer ko lagta hai phone repair ho gaya, lekin jaldi hi problem wapas aa jati hai.

Is wajah se technician ki reputation bhi kharab hoti hai.

βœ… Benefits of Using Original / High-Quality Parts

1. Long Lifespan πŸ•’

Genuine parts zyada durable hote hain aur years tak chal jate hain.

2. Better Performance πŸš€

Display, touch, battery aur other components smooth aur efficient work karte hain.

3. Safe for Mobile πŸ”’

Original parts mobile ke motherboard aur ICs ke liye safe hote hain.

4. Customer Trust 🀝

Genuine parts use karne se customer ko confidence milta hai aur woh dobara aapki shop par aata hai.

5. Value for Money πŸ’°

Thoda mehnga hota hai, lekin long term me paisa bachta hai kyunki baar baar replace nahi karna padta.

πŸ’‘ Pro Tips for Technicians

Customer ko cheap vs original part ka clear difference samjhayen.

Agar customer insist kare, to unhe duplicate part ke risk likhit me bata dein.

Hamesha trusted suppliers se parts khariden.

Customer ki trust ke liye warranty card provide karein.

βœ… Conclusion

Mobile repairing me short-term saving ke liye cheap local parts ka istemal ek galti hai. Technician aur customer dono ke liye behtar hai ke original ya high-quality compatible parts use kiye jayein. Remember: β€œQuality parts save time, money, and reputation.”

πŸ“Œ Meta Description (SEO)

“Cheap local parts can damage your phone and reduce performance. Discover why using original parts in mobile repair is always the best choice.

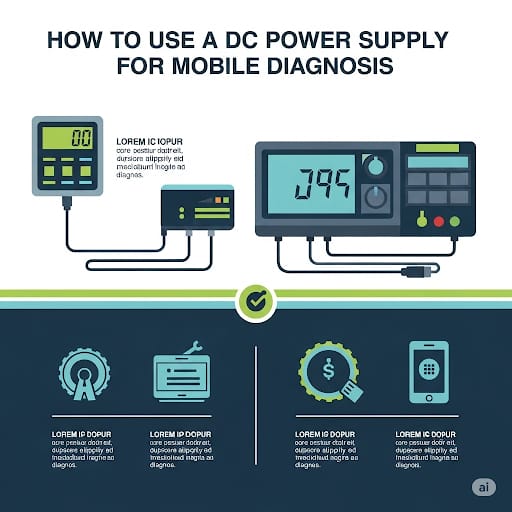
How to Use a DC Power Supply for Mobile Diagnosis

How to Use a DC Power Supply for Mobile Diagnosis

DC Power Supply mobile repairing ka ek bohot important tool hai, jo aapko mobile ke power consumption aur faults ka pata lagane me madad deta hai. Is ka sahi istemal diagnose process ko fast aur accurate banata hai. Aayiye step-by-step samajhte hain:


1️⃣ DC Power Supply ka Purpose Samajhna

Mobile phone battery ki jagah DC power supply connect karke aap phone ki current reading dekh sakte hain. Is se pata chalta hai ke phone short hai, on ho raha hai ya kisi stage pe stuck hai.


2️⃣ Connection ka Sahi Tariqa

Battery connector par positive (+) aur negative (-) terminal identify karein.

DC power supply ka red wire positive aur black wire negative terminal me connect karein.

Voltage 4.2V set karein (mobile battery ke standard ke mutabiq).


3️⃣ Current Reading Samajhna

0 Amp: Phone me koi activity nahi, ya connection galat hai.

0.02–0.05 Amp: Standby mode me phone.

0.3–0.5 Amp: Phone boot ho raha hai.

High Amp (1A ya zyada): Short circuit ya heavy load issue.


4️⃣ Fault Diagnosis Examples

Agar phone on nahi hota aur current direct high chala jata hai β†’ short circuit.

Agar phone boot me stuck ho aur current fluctuate ho β†’ software ya hardware fault.


5️⃣ Safety Tips

Voltage hamesha mobile battery ke standard ke mutabiq rakhein.

Probes galat polarity me na lagayen.

Power supply ka sudden high voltage phone ko damage kar sakta hai.


Conclusion:
DC power supply mobile diagnosis ka ek must-have tool hai jo aapko short detection, boot issues aur faulty components identify karne me bohot madad karta hai. Agar aap ise sahi tariqe se use karna seekh lein to repairing ka accuracy level kaafi improve ho jata hai.

DC power supply for mobile repairing, how to use DC power supply for mobile diagnosis, mobile repairing tools, mobile diagnosis using DC power supply, DC power supply tutorial, mobile short circuit detection, mobile boot issue diagnosis, mobile repairing tips, mobile repairing step by step, mobile repairing training, DC power supply current reading, mobile repairing guide in urdu, phone repairing ka tariqa, mobile hardware repairing, DC power supply ka use, mobile current reading guide, mobile repair troubleshooting, DC voltage setting for mobile repair, mobile repair course in urdu, electronics repair tools

How to Use a DC Power Supply for Mobile Diagnosis

How to Use a DC Power Supply for Mobile Diagnosis

DC Power Supply mobile repairing ka ek bohot important tool hai, jo aapko mobile ke power consumption aur faults ka pata lagane me madad deta hai. Is ka sahi istemal diagnose process ko fast aur accurate banata hai. Aayiye step-by-step samajhte hain:


1️⃣ DC Power Supply ka Purpose Samajhna

Mobile phone battery ki jagah DC power supply connect karke aap phone ki current reading dekh sakte hain. Is se pata chalta hai ke phone short hai, on ho raha hai ya kisi stage pe stuck hai.


2️⃣ Connection ka Sahi Tariqa

Battery connector par positive (+) aur negative (-) terminal identify karein.

DC power supply ka red wire positive aur black wire negative terminal me connect karein.

Voltage 4.2V set karein (mobile battery ke standard ke mutabiq).


3️⃣ Current Reading Samajhna

0 Amp: Phone me koi activity nahi, ya connection galat hai.

0.02–0.05 Amp: Standby mode me phone.

0.3–0.5 Amp: Phone boot ho raha hai.

High Amp (1A ya zyada): Short circuit ya heavy load issue.


4️⃣ Fault Diagnosis Examples

Agar phone on nahi hota aur current direct high chala jata hai β†’ short circuit.

Agar phone boot me stuck ho aur current fluctuate ho β†’ software ya hardware fault.


5️⃣ Safety Tips

Voltage hamesha mobile battery ke standard ke mutabiq rakhein.

Probes galat polarity me na lagayen.

Power supply ka sudden high voltage phone ko damage kar sakta hai.


Conclusion:
DC power supply mobile diagnosis ka ek must-have tool hai jo aapko short detection, boot issues aur faulty components identify karne me bohot madad karta hai. Agar aap ise sahi tariqe se use karna seekh lein to repairing ka accuracy level kaafi improve ho jata hai.

DC power supply for mobile repairing, mobile repairing tools, mobile diagnosis using DC power supply, DC power supply tutorial, how to use DC power supply for phone, mobile short circuit detection, mobile boot issue diagnosis, mobile repairing tips, mobile repairing step by step, mobile repairing training, DC power supply current reading, mobile repairing guide in urdu, phone repairing ka tariqa, mobile hardware repairing, DC power supply ka use

Ask ChatGPT

Advanced Jumper Solutions for Damaged PCB Tracks

Advanced Jumper Solutions for Damaged PCB Tracks

Mobile repairing ki duniya me, jab PCB (Printed Circuit Board) ke tracks damage ho jate hain, to phone ka kaam ruk jata hai. Yeh damage aksar short circuit, overheating, corrosion, ya physical damage ki wajah se hota hai. Aise cases me β€œJumper Solutions” ek advanced repairing technique hai jo device ko dobara functional banane me help karti hai.


πŸ” Jumper Solution Kya Hai?

Jumper lagana ka matlab hai ek naya electrical path banana taake damaged ya cut track ko bypass kiya ja sake. Isme ek patli copper wire ya conductive material use hota hai jo signal ko original point se destination point tak le jata hai.


βš™οΈ Advanced Jumper Solutions Ki Zarurat Kab Padti Hai?

πŸ“Œ Burnt PCB Tracks – Overcurrent ya short circuit ki wajah se tracks jal jana.

πŸ“Œ Corrosion Damage – Pani girne ya moisture se copper track ghul jana.

πŸ“Œ Physical Damage – Girne ya todne se track break ho jana.

πŸ“Œ Manufacturing Faults – Rare cases me PCB design issue.


πŸ›  Step-by-Step Advanced Jumper Process

  1. Damage Identify Karna – Microscope ke zariye track break location find karna.
  2. Track Cleaning – Damaged area ko IPA (Isopropyl Alcohol) se clean karna.
  3. Solder Mask Removal – Track ke ends expose karna jahan jumper connect hoga.
  4. Jumper Wire Select Karna – AWG size aur flexibility ko dhyan me rakhna.
  5. Precision Soldering – Jumper ko dono points pe securely solder karna.
  6. Testing – Multimeter se continuity check karna.
  7. Insulation & Protection – UV mask ya kapton tape se secure karna.

🎯 Tips for Advanced Jumper Repair

βœ… Hamesha schematic diagram ka use karein.

βœ… Shortest and clean path choose karein.

βœ… Jumper wire ko unnecessary bends na dein.

βœ… Proper insulation lagana na bhoolen.


πŸ“Œ Conclusion

Advanced jumper solutions ek aisi skill hai jo sirf professional mobile repair technicians ko perfectly aati hai. Ye technique na sirf phone ko revive karti hai balki PCB ki life bhi badhati hai. Agar aap professional level pe repair karna chahte hain to jumper solution mastering aapke liye must-have skill hai.

advanced jumper solutions, PCB track repair, mobile repairing jumper technique, how to repair damaged PCB tracks, jumper wire soldering, PCB jumper tutorial, mobile PCB repair tips, repairing burnt PCB tracks, mobile repairing advanced tips, jumper solution step by step, PCB corrosion repair, mobile hardware repairing, mobile repairing training, mobile repairing ka tariqa, PCB jumper wire guide

How to Use a DC Power Supply for Mobile Diagnosis

How to Use a DC Power Supply for Mobile Diagnosis

DC Power Supply mobile repairing ka ek bohot important tool hai, jo aapko mobile ke power consumption aur faults ka pata lagane me madad deta hai. Is ka sahi istemal diagnose process ko fast aur accurate banata hai. Aayiye step-by-step samajhte hain:


1️⃣ DC Power Supply ka Purpose Samajhna

Mobile phone battery ki jagah DC power supply connect karke aap phone ki current reading dekh sakte hain. Is se pata chalta hai ke phone short hai, on ho raha hai ya kisi stage pe stuck hai.


2️⃣ Connection ka Sahi Tariqa

Battery connector par positive (+) aur negative (-) terminal identify karein.

DC power supply ka red wire positive aur black wire negative terminal me connect karein.

Voltage 4.2V set karein (mobile battery ke standard ke mutabiq).


3️⃣ Current Reading Samajhna

0 Amp: Phone me koi activity nahi, ya connection galat hai.

0.02–0.05 Amp: Standby mode me phone.

0.3–0.5 Amp: Phone boot ho raha hai.

High Amp (1A ya zyada): Short circuit ya heavy load issue.


4️⃣ Fault Diagnosis Examples

Agar phone on nahi hota aur current direct high chala jata hai β†’ short circuit.

Agar phone boot me stuck ho aur current fluctuate ho β†’ software ya hardware fault.


5️⃣ Safety Tips

Voltage hamesha mobile battery ke standard ke mutabiq rakhein.

Probes galat polarity me na lagayen.

Power supply ka sudden high voltage phone ko damage kar sakta hai.


Conclusion:
DC power supply mobile diagnosis ka ek must-have tool hai jo aapko short detection, boot issues aur faulty components identify karne me bohot madad karta hai. Agar aap ise sahi tariqe se use karna seekh lein to repairing ka accuracy level kaafi improve ho jata hai.

DC power supply for mobile repairing, mobile repairing tools, mobile diagnosis using DC power supply, DC power supply tutorial, how to use DC power supply for phone, mobile short circuit detection, mobile boot issue diagnosis, mobile repairing tips, mobile repairing step by step, mobile repairing training, DC power supply current reading, mobile repairing guide in urdu, phone repairing ka tariqa, mobile hardware repairing, DC power supply ka use